
Introduction
Blogging is among the most profitable online businesses; many bloggers make good money. It is a business that can be done to provide valuable information to users worldwide. Blogging needs passion, and passion makes money.
While many do blogging as a hobby and are not interested in making money, if you combine this hobby with your passion and effort, you can be a successful blogger.
It is an independent career; you don’t have to work under any boss. It has no routine, and you don’t need coding skills as a web developer to start a blog.
Now, everything is provided as DIY, and you can use various tools and plugins to make a career as a blogger.
But does blogging make money? How to be a successful blogger? What are the prerequisites? Can it help to scale your online business?
Today, we will learn how to create a blog and achieve success in blogging. We will also learn about profitable niches and successful blogs and how they can do that.
How to get started with niche selection?

Like every business, you should have a plan to establish your business online. Similarly, in blogging, you should have a plan and a niche in which you show interest.
Pick a niche where you can show your passion and invest your time. You can choose that niche if you provide valuable information and regularly update your visitors.
Here is the list of niches that are popular for blogging:
1. Health & Fitness
2. Fashion
3. Beauty
4. Food
5. Travelling
6. Cars & Bikes
7. Shopping
8. Digital Marketing
and more.
Remember that it is no limit, and choose the niche in which you have passion, skills, and experience.
Ask yourself before choosing a niche for blogging like:
1. What can you provide to your visitors?
2. What unique content can you create?
3. Am I passionate about this topic?
After choosing the right niche, you can start your blogging, and it requires a desktop or laptop and internet connectivity.
Writing a blog will not cost you anything. You only have to pay for your domain and hosting service.
Start blogging with WordPress
1. Grab a domain name and hosting service
You must purchase a domain name and hosting to host your blog online. A domain name is your blog’s URL.
As an example, techzant.com is my domain.
All domains are unique; you can not use the same domain name again. You can’t own my domain name here because I already own it.
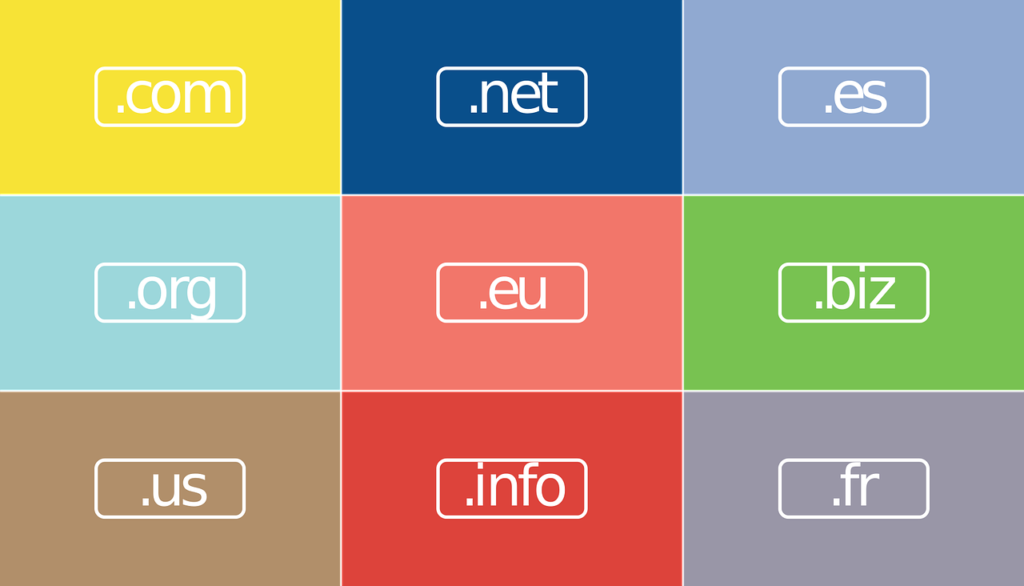
For choosing a domain name, consider these tips:
1. Always choose a top-level domain like .com whenever possible. However, you can select .net or other top-level domains.
2. Keep it short and memorable
3. It should show a representation of your niche or a brand
4. Avoid using numbers and hyphens
5. Don’t choose complicated and misspelled words
To know which domain is available, you can use a service like Bluehost domain name checker or search on Google “domain name checker.”
After choosing a suitable domain for your blog, you must purchase a hosting service. Hosting is the platform where your blog will live, and you will get additional features and support from web hosting.
You can buy hosting from Bluehost, Hostinger, GoDaddy, Siteground, or other services. Compare the plans and features and choose the best one.
As a blogger, you can go with a basic plan, and most of the hosting service provides you a free domain and SSL(Secure Socket Layer) certificate for some months/years along with your project.
SSL is necessary to protect your website from hackers and provides extra security from unauthorized access. Your blog will include HTTPS instead of HTTP, which is better and more trustworthy for visitors.
For example, my blog is SSL-certified and includes HTTPS, and the full URL is https://www.techzant.com.
People generally leave websites that are not protected because there is a chance that their data may be breached or stolen. Those sites are vulnerable to attackers.
After all these steps, check out for billing and read the renewal information. When your plan expires, you can renew the service through payment.
2. Installing WordPress

Running a blog requires an online tool to help you create posts. This tool will run on a browser; you don’t have to install it on your computer separately. WordPress is the most potent tool for blogs and websites, and my blog is made using WordPress.
It has extra features that are easy to use and user-friendly. Also, it has many free and paid plugins that can make your blog outstanding.
Plugins will help you make your posts SEO-friendly and add extra performance to your blog posts.
Installing WordPress is super easy, and it won’t take much time. After choosing your hosting, you can log in and find the option to install WordPress. Install WordPress and put the domain name you prefer for your blog.
Accept the terms of service and click on Install. Wait for a few minutes. Congratulations! You have a fully functional blog up and live on the internet.
3. Designing the blog with a WordPress theme
Themes are the design or layout that will be visible to the users on your blog. Many themes are pre-loaded and free in WordPress; some are premium themes that will cost you.
You can choose a free or paid theme version according to your choice and blog type.
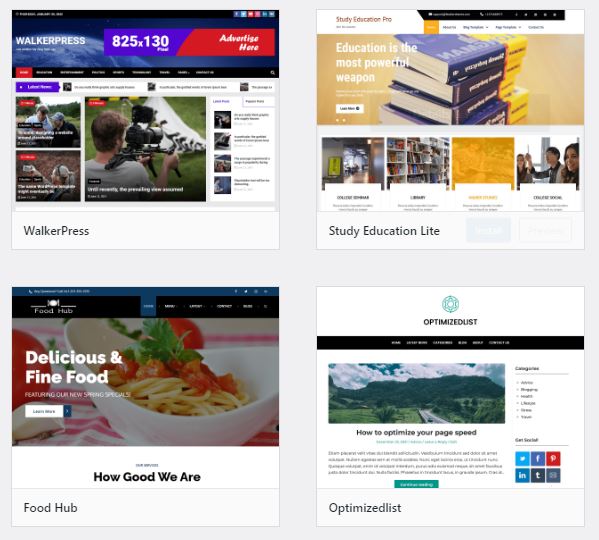
Finding any theme is so easy in WordPress. Head over to Appearance ->Themes and click any theme to install. You can filter it for your search preference or search on Google for the best themes.
Click on “Add New” and choose the theme from Featured, Popular, or Latest. If you know the theme’s name, you can directly search it from the search box.
After picking the suitable theme, click on Install and then activate. Now, your theme is ready to show and use.
After selecting the theme, you can customize it to your requirements. Set the header, footer, menus, pages, widgets, and other features to make it attractive.
Tips for selecting the best theme for your blog:
- Choose a theme that is lightweight and optimized. Check the load time and compare it with others.
- Avoid the slow themes.
- Pick the responsive ones that are mobile-friendly.
- Consider a theme based on your niche that can represent your blog.
- You can use Google’s help to search for the best themes for your blog. Suppose your niche is Food. Then, search on Google “Best WordPress themes for a food blog.”
- Click on Add New-> Feature Filter and choose the Layout, Features, and Subject according to your choice for the best theme suggestion.
4. Customizing and optimizing your blog
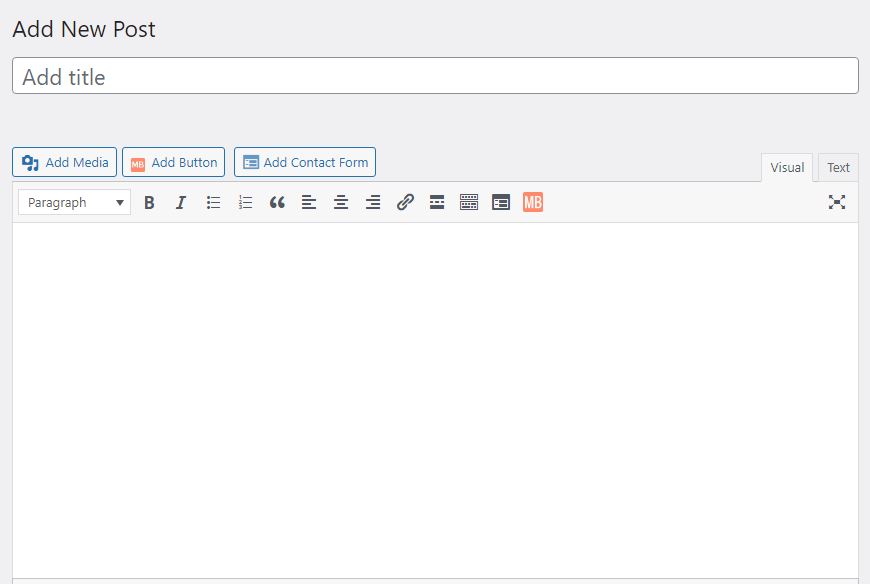
After choosing the theme for your blog, you can start writing your posts. Click on Posts-> Add New on the WordPress dashboard and write your first post. Give the title of your posts and include the headings.
Posts have many features that will make your blogging work easy.
You can categorize your headings as H1, H2, or H3 and make your words Bold, Italic, and Underlined. Your post can also include photos and videos, links to the words, and more.
After writing your post, click on Publish, and it will be published in your blog. Open your blog and check how it looks. If you want to edit anything, visit that post. After editing, click on Update, and your post will be updated.
The posts should be customized and optimized for SEO. WordPress has many plugins to handle optimization problems, and one of the most famous plugins is Yoast SEO.
It will show you what should be included in your post and rank it on search engines.
Install and activate Yoast SEO. Go to the “Your Info” option in Yoast SEO. Put your blog name under the “Website name” option. You can also enter an alternative name for your blog that will appear on your blog.
If you manage this blog, select “Person” from the drop-down menu or choose “Company” if the blog belongs to any group or company.
Put the person or company name and click on “Save Changes.”
5. Setting Google Search Console/Webmaster Tool
Google Search Console is crucial for SEO and indexing your blog in Google Search. Without indexing or crawling, your blog will not appear on Google.
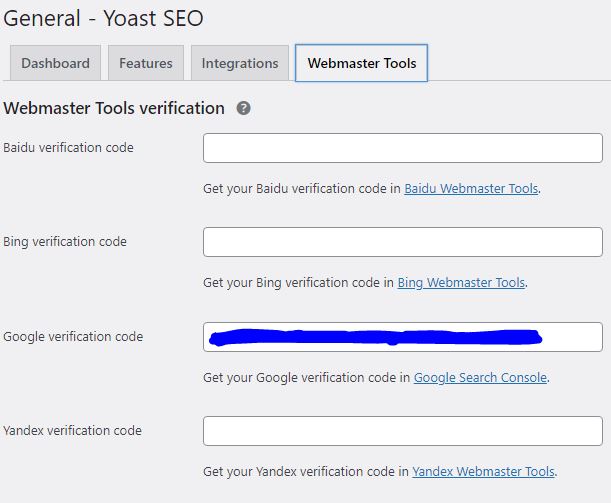
To set up Google Search Console, click on the “Webmaster” option on Yoast SEO and click on “Google Search Console.” You will be shown to log in to your Google account.
Sign in to your Google account and click on “Alternative methods.” Choose “HTML tag” and copy the meta tag.
A meta tag is an alphanumeric string present after content and surrounded by quotation marks.
Paste the meta tag in Yoast SEO’s Google Search Console text box and click “Save Changes.” Now, click on “Verify.” Your blog is currently configured with Google Search Console.
XML sitemap for your blog
An XML sitemap is used to list the URLs of your blog/website. It helps Google and other search engines to crawl your blog whenever you create new posts or pages. Yoast SEO has an inbuilt feature of a sitemap, and it’s easy to set up.
To do this, click on the “Features” option in Yoast SEO, set the “Advanced settings pages” to “Enabled,” and click on “Save Changes.” You will see a new group of menus under Yoast SEO.
Click on “XML Sitemaps” and select the “User Sitemap” tab. Set the “Author/user sitemap” as “Enabled” and save changes.
Now, your sitemap is ready. To check your sitemap, include “/sitemap.xml” at the end of your domain. Example, yourdomain/sitemap.xml
6. Set permalink
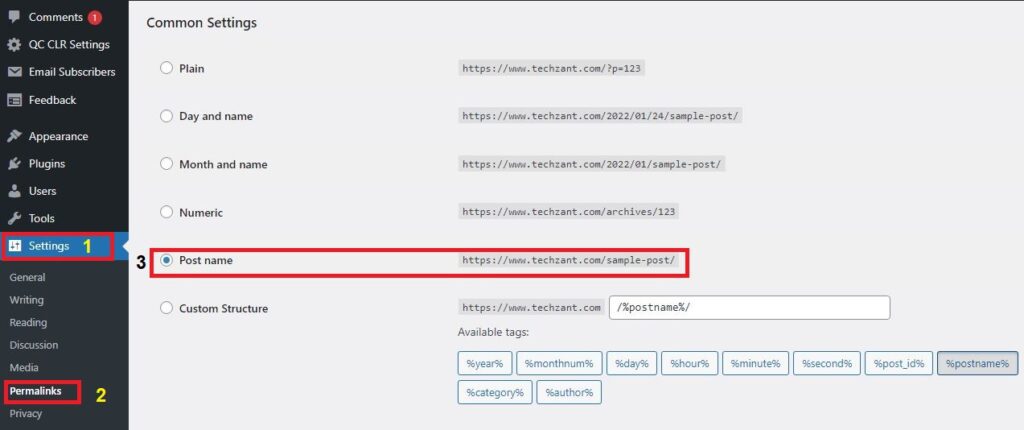
The permalink is the link to your blog posts. It is the full URL of your post, including your domain name. It helps users see what this post wants and what information it can provide.
For example, this is one of my post-https://www.techzant.com/how-to-use-social-media-marketing-for-your-business.
The permalink of my post clearly shows how we can use social media marketing for our business. It brings a clear understanding to users and search engines that help them index.
To set the permalink, go to Settings in your WordPress dashboard and click “Permalinks.” You will see different formats of permalink. I recommend choosing “Post name” and then clicking on Save.
7. Improving your Readability and SEO score

While writing your posts, ensure they are easy to read and understand. Also, the SEO score should be good enough for search engines to crawl easily. Fortunately, Yoast SEO comes with features to help improve readability and SEO.
You can visit the right section to see Readability and SEO options. It will show you whether your post needs improvement or is Good. If it needs improvement, go to the bottom of your post.
You will find the Readability and SEO tab- Check what can be improved. The errors will show you as a small “Red” circle.
The other which passes the analysis will be seen as a small “Green” circle. The issues that have occurred with medium impact will be a small “Orange” circle.
Try to make as many green circles as you can. But don’t stress if you can’t make every circle green. Aim for 80%, and you’ll be on the right track.
8. Setting SEO title and Meta description
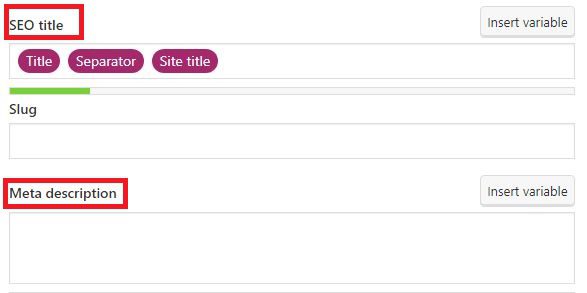
Yoast SEO features SEO title, slug, and meta description, which are essential factors in SEO. The SEO title is the title of your post that will appear in search engines.
Slug is the text shown after your blog/website address. Hyphens automatically separate every slug.
A meta description will show a brief explanation of your post. Whenever you search for any keyword in the search engine, you will see some text as a description and an SEO title link.
That is the meta description, and it helps in crawling web pages. Including meta descriptions is always recommended.
You will also find the keyphrase option in the SEO tab. A key phrase is a keyword that shows the main topic of your blog. For example, if this post is about a blog, “blog” would be my key phrase.
Put the main keyphrase, and you will see in the SEO tab how many times you should include your key phrases in your post.
The more keyphrases you add, the more optimized post will become.
Key Takeaways
- WordPress is one of the best CMS platforms. It provides features like an editor for posts and pages, categorization, content scheduling, and more.
- You can install free or paid themes and plugins to personaliAppearanceearance of your blog per your requirements.
- Interaction is key in blogging. You can use the comment feature to share your posts on social media platforms.
- You can easily use free and paid SEO tools that will help with your article structure and make it SEO-optimized.
FAQ
Is WordPress user-friendly?
Yes, WordPress provides a user-friendly interface. You can navigate it easily without having any experience blogging.
Is WordPress free?
WordPress offers a free version to start a blog at no cost. Suppose you want additional features like your domain name, extra storage, and other premium services. In that case, you can choose paid plans.
How to start blogging with WordPress?
- Create an Account: Sign up on the WordPress website.
- Choose a Theme: WordPress offers a variety of themes. Pick one that suits your blog’s topic and style.
- Customize Your Site: Use the customization options to change the Appearance of your site. You can change colors, fonts, layouts, and more.
- Create a New Post: Navigate to the dashboard and click ‘Posts,’ then ‘Add New.’
- Write Your Blog: Write your content using the text editor provided. The toolbar allows you to add headings, links, images, and more.
- Publish Your Post: Once your article is ready, click ‘Publish’. Your blog post is now live and can be viewed by others.
- Manage Your Posts: You can view, edit, or delete your posts from the dashboard’s ‘Posts’ section.
Conclusion
Following every step and using WordPress, you can start your blogging journey and write your first post. Remember that a blog is for your audiences, not for Google.
Stick with your niche, and don’t introduce irrelevant posts to your blog. Provide valuable information, and your blog will rank on Google. It will get hits and drive traffic.
Once you get traffic, you can monetize your blog through different methods, such as Google Adsense, promoting affiliate products, selling courses and tutorial videos, Ebooks, and much more. There are other methods of earning through a blog.
Invest your time and improve your blog. Provide regular updates and use blogging as a business.
More Resources:
How To Use Blog As An Online Business?
WordPr.ess Vs. Wix- Which Is A Better CMS?

Vijay Kumar is a digital marketing expert and founder of TechZant.
He is passionate about helping businesses grow their online presence through SEO and data-driven strategies.